Unboxing, Formatting, and Installing the Operating System for the Pi
First, credit should be given where credit is due. Most of the networking information comes from A Raspberry Pi-Controlled Robot; Building a Rover with Python, Linux, Motors, and Sensors by Wolfram Donat. This was done on an older version of the Pi so some of the information have changed things here and there but the source of a lot of this information is from this book. It is a very good source for starting out in robotic control with a Raspberry Pi.
Formatting the SD card to install the OS on the Raspberry Pi
The Raspberry Pi is essentially a Linux computer and will not work straight out of the box. We need to install an operating system that will run on-board the Pi. To do this we will need a micro SD card (4GB or larger, 8GB is preferred) and a SD card reader on your personal computer. Note, if your computer does not have a SD card reader you can easily find a USB adapter to plug into your machine.
A quick startup guide can be found here. If this link is down or you do not have access to this PDF on a computer, the process will be summarized below.
- Insert the SD card into your computer. Note: I did this on a Windows machine so I would recommend that route.
- Format the SD card to make sure it is clean and ready for the OS to be installed.
- Download the SD Association’s formating tool (SD Formatter 4.0) from here for the operating system you are using (Windows or Mac).
- Install and run the formatting tool.
- Check that the drive you have selected matches your SD card (it would be really unfortunate if you formatted a different drive and erased all those files.)
- Format the drive.
- Download the New Out Of Box Software (NOOBS!) here.
- Extract the files in the NOOBS Zip you downloaded to the formatted SD card.
- Eject the SD card from your computer after the files have finished transferring and plug it into the Raspberry Pi.
- Hook the Raspberry Pi up to a keyboard, mouse, and monitor. Then insert the USB power cable to turn the Pi on. The Pi should now boot into NOOBS and display a list of operating systems. If it doesn’t you did something wrong with the formatting or file copy go back and reformat the SD! If this works, FANTASTIC, that little board is now a fully functioning computer!
- There should be a list of operating systems you can install. Click Raspbian (the tick box next to the icon should have an x in it). Now click install.
- Go grab a drink or some food! The operating system is now installing. This can take a while (about 20 minutes).
- When the install process is completed the Raspberry Pi configuration menu (raspi-config) will load. Here you are able to set the time and date for your region and enable a Raspberry Pi camera board, or even create users. We can access this at a later date to make changes as we need but for now let’s just enable the camera!
- Upon rebooting, it will boot straight to the command line requesting a login. The default username and password are pi and raspberry respectively. Note: you will not see any writing appear when you type the password. This is a standard linux security feature.
- To start the graphical interface (desktop) type startx.
Making Sure the Camera Works!
Again, a great guide with video is here. Again below will summarize the steps to making sure the camera works!
First let’s physically install the camera board.Make sure your Pi is off when installing! The flex cable has gray connector strips on the back side. Behind the Ethernet port is a black plastic connector this goes into. Lift the plastic tabs on the side of this connector to unlock the connector. Insert the flex cable so the tin connectors are facing away from the ethernet port and are level. Push the plastic tabs back down so the wire is locked in place. When done, the setup should look like Figure 1. Great now the camera is physically installed!
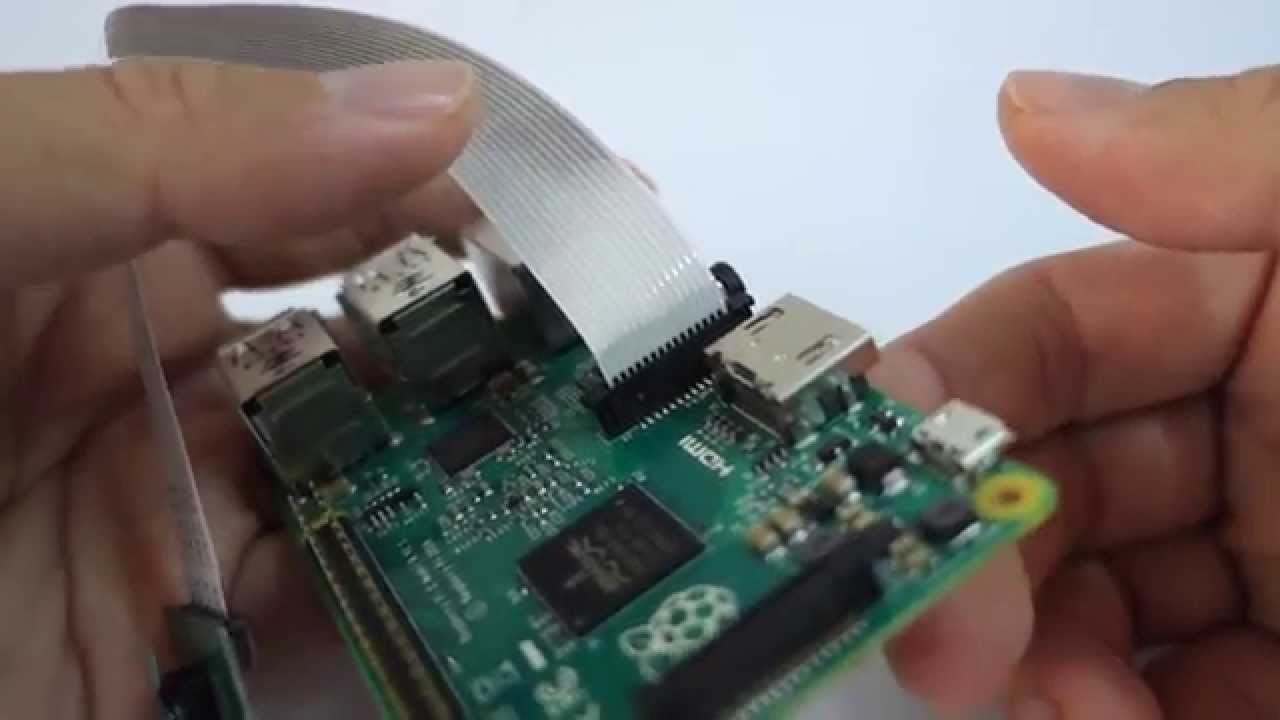
Figure 1: Raspberry Pi with camera board installed.
Now we can fully connect the Raspberry Pi again. Make sure it is connected to the internet by plugging in an ethernet chord or connecting via wifi. When it boots open the command terminal and upgrade the firmware to the latest version through the commands:
$ sudo apt-get update
$ sudo apt-get upgrade
Now we will let the Pi know we want it to use the camera pins. In the command terminal type:
$ sudo raspi-config
to bring up the configuration settings for the Pi. Go to the Enable Camera option. Choose the enable option. Select finish and reboot the Pi! Now everything should be ready to take a picture so lets try! First, go to the graphical user interface (type startx at the terminal). To test it open the command terminal (seen in Figure 2) and type:
$ raspivid -t 10000
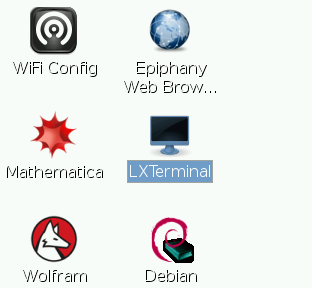
Figure 2: Raspberry Pi graphical user interface with LXTerminal highlighted.
This should have displayed a picture on the monitor for 10 seconds (note the units of the argument after the -t are in ms). Hopefully it all worked!
Installing Software and VNC
In this section we will set up a VNC (Virtual Network Computing) server in order to access the graphical user interface of the Pi remotely instead of constantly having to hook it up to a monitor. We will auto configure the wifi so the pi is connected to a network (not necessarily one with internet connection!). Make sure a WiFi dongle is plugged into a USB port on the Pi! We will also install some other supplemental software needed for image processing. If you do not know how to hook up the Pi to an internet network it is detailed below but you still need to access the internet for updates/upgrades so either skip to the GUI network configuration first or plug in an ethernet cord to get the Pi online!
Setting Up the WiFi Connection
It is important to note unlike a standard Windows, Linux, or Mac operating system, Raspbian does not notify you of updates. Thus, it is a good habit to force your Pi to look for updates whenever installing new software (ideally daily but that may be overkill). Thus before doing anything bring up the terminal and update and upgrade the Pi through the commands:
$ sudo apt-get update
$ sudo apt-get upgrade
Now, we can configure the network through the terminal or the GUI, I will outline both below.
Terminal Network Set-Up
Once the upgrade is complete, first install wpasupplicant (Note: This may already be installed).
$ sudo apt-get install wpasupplicant
You may get a message saying wpasupplicant is already in the newest version, that is fine. Once it is installed use any text editor to open the network config file (here we use nano which will open it in the terminal):
$ sudo nano /etc/wpa_supplicant/wpa_supplicant.conf
Here is where you put the network information. Leave the first two lines of the file as they are, then add:
network={
    ssid="_your network id_"
    psk="_your network key_"
    proto=WPA
    key_mgmt=WPA-PSK
    pairwise=TKIP
    authalg=OPEN
}
Replace “your network id“ and “your network key“ with your network name and key (the network key is the password that has been set on the network to log into it from any device). It should be noted, if you care about security, this does leave your network name and key in a plain text file for any half-decent hacker to find and use.
Save the file and reboot your Pi for the changes to take place.
$ sudo shutdown -r now
When the Pi reboots, you should have a wireless connection!
GUI Network Set-UP
In the top right of the desktop of the Pi you will see a wifi icon. Click it, choose your network you want to connect to and enter the passkey! Easy as that (but not quite as cool as editing a config file right?!).
Check Connection
Now to make sure the Pi is connected to the internet bring up the terminal and type:
$ ifconfig
This displays all your internet connections! You should see three connections listed eth0, lo, and wlan0. Eth0 is your ethernet cable connection if you have one, wlan0 is the one that should have just been configured. If there is an IP address WOO HOO the Pi is connected to the internet. To make sure try connecting to your favorite web page (if your network has an internet connection and isn’t a LAN)
Creating a Static IP on the Network
In order to connect to your Pi you must know it’s “name”. Imagine your Pi as another person. If you want to get their attention from across the room you typically have to yell their name. This is where a Static IP address comes in! Think of a Pi’s IP address as its name (this is true for any network device). The funny thing about computers on a network is they can change their IP address whenever they connect, thus we have to set the Pi’s IP address so when we try to connect to it we call it the right “name” to get its attention. If you don’t care for this metaphor you are going to have to do this anyway!
First we need some information about your connection. In the terminal enter:
$ ifconfig
Again this should list some connection information, eth0, lo, wlan0. We are attempting to create a static IP on the wireless network thus take note of several details about the wlan0. We are interested in (write these down!),
- inet addr - the Pi’s current IP address.
- Bcast - the broadcast IP range.
- Mask - the subnet mask address.
We need a little more information to finish this up. So now, in the terminal, enter,
$ netstat-nr
We are interested in (write down the ones that are not 0.0.0.0),
- Gateway
- Destination
Now the config file can finally be edited to gives a static IP! Let’s open it to be edited in the terminal by entering,
$ sudo nano /etc/network/interfaces
You should get something that looks like this,
auto lo
iface lo inet loopback

auto eth0
allow-hotplug eth0
iface eth0 inet manual

auto wlan0
allow-hotplug wlan0
iface eth0 inet manual
wpa-config /etc/wpa_supplicant/wpa_supplicant.conf
It may have some additional entries but that should be what it looks like for the most part. Again, if you are worried about security, the wpa_supplicant.conf has the network information and password in a plain text file that can be read very easily.
Now let’s enter the information for our static IP! Edit the file so that it looks like this!
auto lo
iface lo inet loopback

auto eth0
allow-hotplug eth0
iface eth0 inet manual

auto wlan0
allow-hotplug wlan0
iface eth0 inet static
address ”_the static IP address_”
netmask ”_the netmask found above_”
network ”_the network found above_”
broadcast ”_the broadcast found above_”
gateway ”_the gateway found above_”
wpa-config /etc/wpa_supplicant/wpa_supplicant.conf
Exit and save the file! Now reboot the Pi,
$ sudo shutdown -r now
To see if everything worked open the terminal and type,
$ ifconfig
Under wlan0 the IP address should be the one you set! Now to test the connection type,
$ ping "_the gateway found above_"
If everything if configured correctly you should get a few printouts that read,
64 bites from ”_the gateway found above_”: icmp_req:1 ttl=64 time=1.24ms
If all of that works CONGRATS you have now set a static IP! We will soon be able to access the Pi remotely!
Setting Up Secure Shell (SSH) and Virtual Network Computing (VNC)
SSH
Secure Shell allows us to remotely log into the raspberry pi but only in a terminal setting. However, you will notice everything we have done has been through the terminal so this is invaluable. We will first enable this on the Pi! In the terminal enter,
$ sudo raspi-config
Under Advanced Options select SSH and enable. That’s it! Now onto your PC. For SSH I use PuTTy to connect (on windows). Putty can be downloaded here. Now simply run it and enter the static IP address you created earlier! It should prompt you with,
login as: "_the username for the pi (default is pi)_"
pi@: "_the IP address of the Pi_" password: "_the password for the pi (default is raspberry)_"
Now you should be logged into the terminal of the Pi! Note: This can be done on Linux as well by using the command,
$ ssh -l pi "_the IP address of the Pi_"
VNC
Virtual Network Computing (VNC) is useful for those less Linux savy. It allows for the user to see the desktop of the Pi instead of the terminal. The terminal and other programs may still be accessed like you were logged straight into the Pi. However, some things, like video streams, might not work as if you were hooked straight into the machine. This is simple enough to install. On the Pi open the terminal and enter,
$ sudo apt-get install tightvncserver
This installs TightVNC, which is possibly the easiest VNC package to get running. Once it is installed you can start the server with a command line,
$ vncserver :1 -geometry 1024x768 -depth 16
On your personal computer install a VNC client. I recommend realVNC found here. You may have to enter some information for a free key which is good for 5 computers. To connect to the Pi through VNC enter,
$ "_the IP address of the PI_":1
You can get this to start on boot. However, it is probably better to ssh in and start the server when needed.
Setting Up an Ad Hoc Network
Now let’s pretend we don’t live in a perfect world where we always have a network connection we can talk to each other through. What if we’re bringing Pheeno out to an unknown environment or to some school outreach event? What if we don’t have a network to connect to the Raspberry Pi through? Are we finished?! Fear not for the Raspberry Pi can become a server of an Ad Hoc Network! We don't want to do this unless we are taking Pheeno (or the Raspberry Pi) out of the lab.
Once again we have to edit the interfaces file! I would STRONGLY recommend making two files saved somewhere. One for when you are in the lab, and one when you are in the field. None the less again we must edit the interfaces file,
$ sudo nano /etc/network/interfaces
We want to edit the wireless section again so it looks like the following,
auto wlan0
iface wlan0 inet static
address "_some IP address (192.168.119.1)_"
netmask "_some netmask (255.255.255.0)_"
wireless-channel 1
wireless-essid "_some name for the broad casted network_"
wireless-mode ad-hoc
Save the file and exit. Then restart the wireless connection,
$ sudo ifdown wlan0
$ sudo ifup wlan0
Now you should be able to see the network being broadcast. Do not connect to it. It is not ready to receive connections. It is simply broadcasting it’s ad-hoc network but will not assign IP addresses to any computer connecting to it. We need to set up the Pi to assign IP addresses. First we will install isc-dhcp-server,
$ sudo apt-get install isc-dhcp-server
Now we have to edit the config file to get it to work! Open the config file with the command,
$ sudo nano /etc/dhcp/dhcpd.conf
There is a TON of stuff in this file. You want the only uncommented lines to be (changes in red),
ddns-update-style interim;
default-lease-time 600;
max-lease-time 7200;
authoritative;
log-facility local7;
subnet "_some subnet similar to the IP address (192.168.119.0)_" netmask "_some netmask (255.255.255.0)_" {
    range "_some range of assignable IP address (192.168.119.5 192.168.119.100)_";
}
Here is an example of what it may look like,
#
# Sample configuration file for ISC dhcpd for Debian
#
#

# The ddns-updates-style parameter controls whether or not the server will
# attempt to do a DNS update when a lease is confirmed. We default to the
# behavior of the version 2 packages ('none', since DHCP v2 didn't
# have support for DDNS.)
ddns-update-style interim;

# option definitions common to all supported networks...
#option domain-name "example.org";
#option domain-name-servers ns1.example.org, ns2.example.org;

default-lease-time 600;
max-lease-time 7200;

# If this DHCP server is the official DHCP server for the local
# network, the authoritative directive should be uncommented.
authoritative;

# Use this to send dhcp log messages to a different log file (you also
# have to hack syslog.conf to complete the redirection).
log-facility local7;

# No service will be given on this subnet, but declaring it helps the
# DHCP server to understand the network topology.

#subnet 10.152.187.0 netmask 255.255.255.0 {
#}

# This is a very basic subnet declaration.
subnet 192.168.119.0 netmask 255.255.255.0 {
range 192.168.119.5 192.168.119.100;
}
#subnet 10.254.239.0 netmask 255.255.255.224 {
#  range 10.254.239.10 10.254.239.20;
#  option routers rtr-239-0-1.example.org, rtr-239-0-2.example.org;
#}

# This declaration allows BOOTP clients to get dynamic addresses,
# which we don't really recommend.

#subnet 10.254.239.32 netmask 255.255.255.224 {
#  range dynamic-bootp 10.254.239.40 10.254.239.60;
#  option broadcast-address 10.254.239.31;
#  option routers rtr-239-32-1.example.org;
#}

# A slightly different configuration for an internal subnet.
#subnet 10.5.5.0 netmask 255.255.255.224 {
#  range 10.5.5.26 10.5.5.30;
#  option domain-name-servers ns1.internal.example.org;
#  option domain-name "internal.example.org";
#  option routers 10.5.5.1;
#  option broadcast-address 10.5.5.31;
#  default-lease-time 600;
#  max-lease-time 7200;
#}

# Hosts which require special configuration options can be listed in
# host statements.   If no address is specified, the address will be
# allocated dynamically (if possible), but the host-specific information
# will still come from the host declaration.

#host passacaglia {
#  hardware ethernet 0:0:c0:5d:bd:95;
#  filename "vmunix.passacaglia";
#  server-name "toccata.fugue.com";
#}

# Fixed IP addresses can also be specified for hosts.   These addresses
# should not also be listed as being available for dynamic assignment.
# Hosts for which fixed IP addresses have been specified can boot using
# BOOTP or DHCP.   Hosts for which no fixed address is specified can only
# be booted with DHCP, unless there is an address range on the subnet
# to which a BOOTP client is connected which has the dynamic-bootp flag
# set.
#host fantasia {
#  hardware ethernet 08:00:07:26:c0:a5;
#  fixed-address fantasia.fugue.com;
#}

# You can declare a class of clients and then do address allocation
# based on that.   The example below shows a case where all clients
# in a certain class get addresses on the 10.17.224/24 subnet, and all
# other clients get addresses on the 10.0.29/24 subnet.

#class "foo" {
#  match if substring (option vendor-class-identifier, 0, 4) = "SUNW";
#}

#shared-network 224-29 {
#  subnet 10.17.224.0 netmask 255.255.255.0 {
#    option routers rtr-224.example.org;
#  }
#  subnet 10.0.29.0 netmask 255.255.255.0 {
#    option routers rtr-29.example.org;
#  }
#  pool {
#    allow members of "foo";
#    range 10.17.224.10 10.17.224.250;
#  }
#  pool {
#    deny members of "foo";
#    range 10.0.29.10 10.0.29.230;
#  }
#}
Python and OpenCV
Pheeno uses OpenCV for its image processing and I have chosen to code in Python (as C/C++ get too messy for me). To finish the set up for the Pi let’s install OpenCV for python and make sure it runs. Again make sure the firmware is updated and upgraded,
$ sudo apt-get update
$ sudo apt-get upgrade
Now we will grab the libraries for OpenCV.
$ sudo apt-get install libopencv-dev python-opencv python-picamera -y
To test whether everything is working properly let’s create a quick python code with OpenCV to display some windows with the camera feed and mess with their colors! Make a new python code and save it in the home folder as cameraDisplay.py. Open this empty file and fill it with,
import picamera
import picamera.array
import cv2

#CAMERA ROUTINE!
with picamera.PiCamera() as camera:
	with picamera.array.PiRGBArray(camera) as stream:
		camera.resolution = (640,480)

		while True:
			camera.capture(stream,'bgr',use_video_port = True)
			#stream.array contains the image array in bgr order!
			gray = cv2.cvtColor(stream.array, cv2.COLOR_BGR2GRAY)
			HSV = cv2.cvtColor(stream.array, cv2.COLOR_BGR2HSV)
			cv2.imshow('Video!', stream.array)
			cv2.imshow('GRAY!', gray)
			cv2.imshow('HSV!', HSV)
			if cv2.waitKey(1) & 0xFF == ord('q'):
				break
			#reset the array for next capture
			stream.seek(0)
			stream.truncate()

		cv2.destroyAllWindows()
To run it open the terminal and enter,
$ python cameraDisplay.py
Three windows should pop up and show the camera feed with different color schemes (RGB, Gray Scale, and HSV). If that works, YOU'RE DONE! The Pi should be ready to go and be used however you see fit!